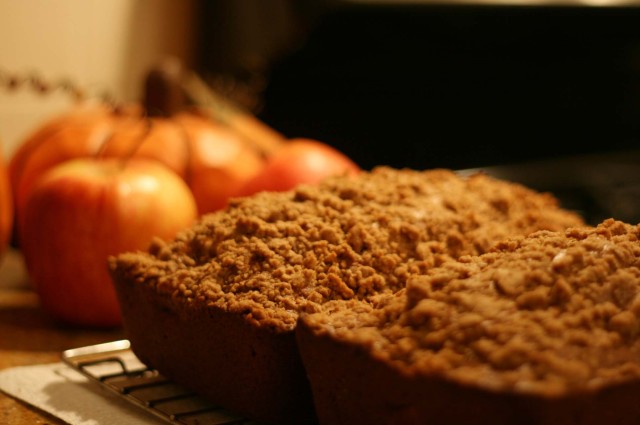
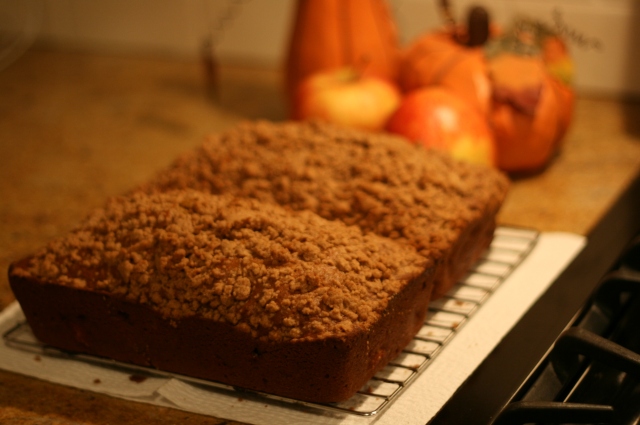
Apple Pumpkin Bread with Streusel Topping

Apple Pumpkin Bread with Struesel Topping

Decided to repost this recipe. It’s easy. It’s good. It’s very fallesque. It makes two beautiful loaves. Pop one in the freezer for the morning after gorge of turkey for a lovely brunch. Or eat both at the same time with both hands or a shovel- I don’t judge.

Below is the original post, the printable recipe also included. Enjoy! New recipes to come. I have to re-learn my camera and her 5 billion settings, poor girl has been cast aside for too long.

b

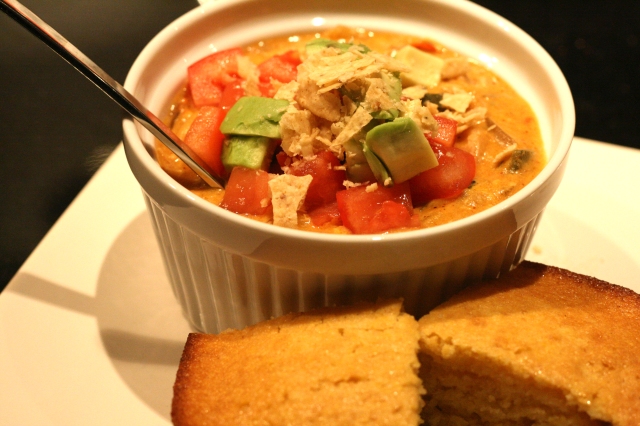
Originally published, 12/10/10: I’m a little behind in my cooking. I’m also a lot behind on my posting- guilt gulp.  I need a 36 hour day. Thanks for your patience, those that have been checking daily for new recipes! Keep up the consistency.  I’ve added a printable recipes link, so hopefully that makes trying out recipes a little easier. Let me know if the links for prints don’t work! I’ve also added the printable link to previously posted recipes if you wanted to try the Chicken Chili or Cornbread (great warm-up winter meal) but didn’t want to print the entire post. Your solution has arrived.

While I may be a little late in the autumnal flavors game, this bread is still fantastic after the fall baking is done. If your house needs a little fresh scenting, bake a batch of these to fill it with cinnamon, clove, pumpkin smells.  The streusel, which wikipedia terms as “something scattered or sprinkled” (very detailed), has a little salt, a little sweet, a little crunch. A palate trifecta.

This recipe makes two  loaves- one to eat now, one to eat later. One to give, one to freeze.  Whatever your choice, I’m okay with it! Make them as mini-loaves or muffins? Genius! Just adjust the baking time as they may finish faster. Check them after 25-30 minutes for smaller loaves or muffins. This bread is a sweet quick bread and very moist. Be careful when you remove them from the baking pan so they don’t fall apart. One loaf mysteriously disappeared from my counter rather quickly, apparently my recipe taster gave this a pretty high rating. The other loaf was enjoyed by my fellow teachers at our mid-semester breakfast.

I honestly don’t remember where I got this recipe years ago or I would give adaptation credit where credit is due! I’ve adapted the topping quite a bit from the original- I found the original very dry and too flourly. It needed more butter and more sweetness- who doesn’t need more butter and sweetness in their life? More punch in the spices also picked up the bread flavors as well. In the main bread recipe, I punched up the pumpkin and some of the spice combination. I’ve thought about trying it with apple butter (I know I’m obsessed) in place of the oil to lighten it up. That will be the next batch.

Now on to finishing a grad school final project and THEN holiday baking and there’s a lot of it. Soon to come: Cookies and more cookies.

Apple Pumpkin Bread with Streusel Topping

Printable Recipe

Apple Pumpkin Bread with Streusel Topping

Apple Pumpkin Bread with Streusel Topping

Makes 2 (9×5) loaves. Freeze one. Give One. Eat Both. The choice is yours!

3 cups all-purpose flour
2 tsp. baking soda
2 tsp. ground cinnamon
1 tsp ground nutmeg
1 tsp ground cloves
1 tsp ground allspice
1 tsp salt
2 cups sugar
4 large eggs
1- 14.5 oz can pumpkin puree
3/4 cup vegetable oil
1 1/2 tsp vanilla extract
2 1/2 cups peeled, cored, and diced firm apples (Fugi, Gala, Granny Smith, etc)

Streusal Crumb Topping:
1/3 cup plus 1 TBL flour
2 1/2 tsp pumpkin pie spice
1/4 cup brown sugar
3 TBLS melted, unsalted butter
1/4 tsp vanilla extract

1. Preheat oven to 350 degrees.
2. Sift dry ingredients together in a medium-size bowl. In a large bowl, combine eggs, pumpkin puree, oil and vanilla.  Stir dry ingredients into the large bowl of wet ingredients. Mix until just combined.
3. Fold in apples. Don’t overmix it will mess with the glutens in the flour and make the bread tougher and denser.
4. Divide between two pans sprayed with cooking spray.
5. In a bowl, combine the flour, spice, sugar. Stir the vanilla into the melted butter. Add the butter/vanilla to the dry ingredients. Mix together to form a buttery crumby topping.  Sprinkle, best to just use your fingers and get in there, over the bread pans covering each generously.
6. Bake for 50-60 minutes, test with toothpick to make sure it’s done.
7.  Cool 5 minutes or so in the pans. Gently turn out of pan and let cool on racks.
8. If freezing, wrap in aluminum foil and then place in a freezer bag.

Stay warm readers!

b

Posted in Bread & Baking, Breakfast & Brunch, Freezer Friendly | Tagged , , , , , , , , | Leave a comment

Winner Winner Chicken Chili Dinner

Chicken Chili: Take Two.

Last year I posted a pretty good Spicy Chicken Chili– but I’ve been tweaking.This is one great Chicken Chili (better than the previous.) In my search, I started combining from so many different recipes, it was hard to replicate what I was doing.

My cooking group had a chili night so this was my charge. Chicken Chili. Someone brought vegetarian, someone brought traditional, etc… There seemed to be some raving going on about my concoction and when asked for the recipe, I panicked! I pulled something together and emailed it off to my culinary buddies, sweating hoping it tasted anything remotely like the original. A few months ago, at our Burmese themed dinner- crazy, good stuff- culinary buddy turns and says, “Oh, I forgot to tell you we had a Chili cook-off at work (she works for a very, very large automotive company..) and your Chicken chili won 3rd prize.” What?! Whew, the recipe worked.  The best thing she said about the recipe, “I never thought about cooking with layers. This recipe really adds layer upon layer.” Here’s to layering, also my favorite wardrobe tactic as well.

So new Maru husband and I made this the other night and I followed my recipe I had doled out to see what would happen. I made a few tweaks, again, but this is good. GOOD! I tell you as an old married lady of only two weeks. (I shall gush about the wedding when I get pictures back and can show you something but it was f-u-n. People laughed they cried they ate. All was good.)

Bee Brulee Chicken Chili Recipe (printable recipe)

2 lbs boneless chicken breast (or use pulled chicken from a rotisserie chicken- about 3 cups worth)

1 tablespoon vegetable oil

1 large onion, diced

3 medium jalapenos, minced (keep seeds for spicier chili)

3 poblano chiles, stemmed, seeded and chopped

3 anaheim chiles, stemmed, seeded, and chopped (if using dried chiles- see note at bottom- prep dried chilies first!)

6 garlic cloves, minced (about 2 Tablespoons)

2 cans Cannellini beans, drained and rinsed

6 Tablespoons butter

1/4 cup of all-purpose flour

2 cups chicken broth (divided)

2 cups half and half

2 tsp hot sauce (we like Cholula!)

3 tablespoons fresh lime juice (from 2 to 3 limes)

2 tablespoons chili powder

1 1/2 tsp coriander

3 teaspoons ground cumin

2 teaspoons salt

1 teaspoon fresh ground pepper

2 4-oz. cans of diced mild green chilies, drained

1 1/2 cups of Monterey jack cheese shredded

1/2 cup minced cilantro

Extra Toppings for your finished bowl: diced fresh tomato, diced avocado, sour cream, more cheese, diced bacon, crushed tortilla chips, more squeeze from a lime, diced jalapeno, etc…

1. If using a rotisserie chicken, pull off all the meat and put aside. Skip to step 3.

2. If using boneless chicken breast, chop in to 1/2″ pieces. Season with salt, pepper and some chili powder (maybe a tsp or so) Heat oil in a large dutch oven over medium-high heat. Cook until browned and done. Remove chicken from pot and put aside.

3. In the same dutch oven (don’t clean out the chicken cookings! Flavor Layers!), add the vegetable oil and heat over medium heat. When oil is hot, add onions, jalapenos, poblanos, anaheims, cumin, coriander, 1/4 tsp of salt, 1/2 tsp of pepper, and chili powder. Cover and cook- stirring occasionally, until vegetables are soft, about 10 minutes. Remove vegetables from pot and set aside.

4. In the same pot (don’t clean out the flavor layers!), melt the butter over moderately low heat. Don’t let it burn. Add the flour and whisk continuously for about three minutes. The flour will darken and smell good.

5. Stir in onion-chiles mixture and gradually add 1 cup of broth and 2 cups of half-and-half whisking the whole time. Bring the mixture to a boil and simmer over low heat, stirring occassionally, for five minutes or until thickened. Stir in hot sauce, lime, cilantro, and season with salt and pepper. Add more chili powder and cumin to taste if necessary. Add beans, green chilies and chicken. If chili is very thick, add the additional one cup of chicken broth. Cover and cook, stir occassionally for about 20 minutes. Stir in cheese until it melts and serve.

*Note about dried chiles: So easy to use but you have to rehydrate them first. Boil some water, stick in the chiles- let them hang out for about 20-25 minutes until they are soft. Take them out- and deseed-destem. Some folks use the water to substitute for broth in their recipe- totally up to you. If the leftover water tastes bitter, dump it. It has some good spicy flavor to it, go for it! Use it as your layer in this chili, in place of some of the chicken broth.

Enjoy this with my cornbread (click the link to get to it) recipe posted last year!

From the new Marubride,

b

Posted in Freezer Friendly, Soups, Uncategorized | Tagged , , , , | Leave a comment

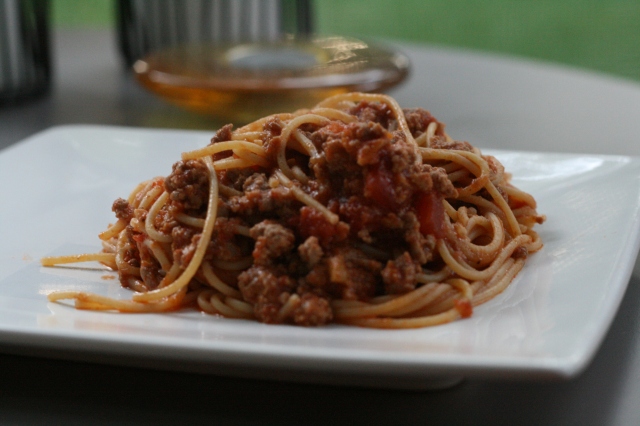
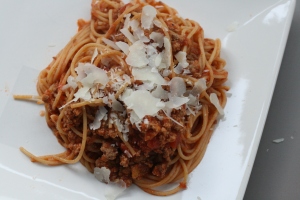
Bolognese Sauce

Bolognese

I grew up eating ground meat cooked up with a jar of Ragu. That was spaghetti in our house. I often made said dinner as a youngin’ of seven for the bargain chore price of $1.00. Now, before I get a bunch of hate mail- there is nothing wrong with this dinner. It’s a staple of many a busy American household and something I will use when crunched for time and craving spaghetti; however, I had no idea for 20-some years that something else existed. That this meal, this sauce, even had another name. Bolognese.    (We also ate almost all our vegetables from cans- spinach, asparagus, peas, etc.. Imagine my floor dropping astonishment when I tried fresh asparagus at the age of 19. Or fresh sauted spinach…Just imagine. Mind blowing.)

So we have Bolognese- tomato meat sauce, quite simply. But, oh no, this is not a simple sauce when tasted. LOOORRRD, is it something.

Prior to my cooking experience of the last 18 years and counting, the magazine- Cooks Illustrated frightened and generally bored me.  Now, I  look forward to its arrival like a Zappos package of shoes being delivered. This did not happen overnight, more like a series of 6570 nights. I’m no math genius (no comment marumodern!)but I think that equates to about 18 years.

Anyways, I digress…I turn to CI for many recipes because they make the claim of trying exhaustive techniques and trials to get to just the right recipe. I certainly don’t have time to make 134 versions of apple pie to get to the best one. Occassionally, I find their recipes to be a whole lot of work with eh-so-so end results. This, my friends, is not one of those recipes. It is simple. It’s eye-rolling delicious. It is, even better, freezable. Disclaimer- it does take a few hours but none of it is complicated or difficult to undertake. DOUBLE it and freeze a bunch. The new CI just came yesterday claiming to have an “ultimate” bolognese. This cook is going no where near a chicken liver as their new recipe does- sticking with this one.

What makes this so good is all the layers of fat, sorry but it’s true (and worth it sometimes.) butter fat- meat fat- milk fat. Layers of flavor are key to most good to great recipes.

Tip: If you have a food processor, mince up the onion-carrot-celery all at the same time. You need 6-ish tablespoons. Heck, throw your whole cloves of garlic in their too.

Italian Bolognese Sauce (adapted from Cooks Illustrated, 1999)

Printable Recipe

(Yield: approximately 3.5 cups; Easy to double and great to freeze)

3 tablespoons salted butter

2 tablespoons minced onion

2 tablespoons minced carrot

2 tablespoons minced celery

2-3 garlic cloves, minced

½ tsp salt

¼ tsp ground pepper

1 lb meatloaf mix (1/3 lb ground beef chuck, 1/3 lb ground veal, 1/3 lb ground pork)

1 cup whole milk

1 cup dry white wine

1 (28 oz) can crushed tomatoes

  1. Heat butter in a large sauce pan or Dutch oven over medium heat. Saute onion, carrot, celery and garlic until softened but not browned. Add ground meat and ½ teaspoon salt. Crumble meat in to small pieces as it cooks. Cook, about three minutes, until meat just loses color but not yet browned (otherwise it will be tough little chunks in your sauce.)
  1. Add milk and bring to a simmer. Continue to simmer until milk evaporates and only the clear fat remains, about 10 to 15 minutes. If you double the recipe, simmer for 30 minutes.
  1. Add the wine and bring to simmer. Continue to simmer until wine evaporates, about 10 to 15 minutes. If you double the recipe, simmer for 30 minutes.
  1. Add tomatoes and their juices and bring to a simmer. Reduce heat to low. Sauce should be at a very low simmer, with an occasional bubble or two at surface. Simmer, stirring occasionally, until liquid has thickened- about three hours. Adjust seasonings with salt and pepper. Serve warm.

Refrigerate for several days or freeze. Warm over low heat before serving.

Necessary accessories: crusty bread for dipping, glass of red wine, someone you love to slurp pasta with ala Lady and The Tramp style.

Enjoy!  b
Posted in Beef, Freezer Friendly, Pasta, Uncategorized | Tagged , , , , , , , , | Leave a comment

Double Stuffed Corazon: Fancy named Taco Meat (Picadillo)

Disclaimer- I did not take this picture…I mean, I took it, from the internet…http://images.fanpop.com…Tacos - mexican-food photo

My brain is stuffed full of wedding list items to tick off one by one. Today is pick cupcakes, french macaroons and brownies day. It will be really, really awful.

Everything else is coming together- wacky, red-haired photographer: check. Catering- check (I’ll talk more about that food another time.) License- applied. Shoes- very important- check. Dress- check. A flurry of girly appointments- check. Groom- check. I think we’re good to go!

Since I’m one of those brides who could eat mexican or italian food every night of the week, Sunday was whip up some stuff day: Thus was produced, Bolognese sauce (another post day- ungodly good stuff) and Picadillo filling (aka taco meat.) Post haste beginning of bridal boot camp soon.

First up, homemade taco meat, also known in fancier terms as Picadillo. Or if you spell it with an “e”, Pecadillo, apparently means “little sin.” Quite perfect.

My good friend, Amy, passed this little recipe on to me years ago and we’re both hooked. I come running when she calls and says, “We’re making tacos. Want to come over?” You don’t have to ask me twice.

Once you make it, not from a little overly salty packet, you won’t go back. Easy- check. Tasty- check. Freezer friendly- check. It just tastes fresher than using the pre-made spice packet for taco seasoning.

I usually double the recipe and freeze a ton. It’s great for tacos, enchiladas, nachos, what ever  your little corazon desires.  What we did, witnessed at Amy’s house as well: Double Decker Tacos.

Here’s the goods: (adapted from Food Network recipe):

PICADILLO (TACO MEAT)  printable recipe

Can be doubled, tripled, frozen.

1 Tablespoon corn oil (I’m sure any old oil is fine- I had Canola on hand) even cooking spray if you wanted to cut out some calories/fat

1 small/medium onion, diced (about 1/2 cup)

2 garlic cloves, minced

1 jalapeno pepper, stemmed, and minced- leave the seeds if you want spicier meat

2 tablespoons chili powder

1 1/2 teaspoons cumin

Salt and Pepper

1 14.5 oz can of diced tomatoes

1 pound ground sirloin, ground chicken, or ground turkey (I found I needed more salt when using turkey instead of beef but not a lot.)

1/3 cup chicken broth

1/4 cup fresh cilantro leaves, roughly chopped

1. Heat oil until hot over medium heat in a large skillet. Add onions, garlic and spices. Season with salt and pepper. Cook until onions are softened over medium/medium-low heat, about 10 minutes. Stir occasionally. Add tomatoes and boil until thickened, about 2 minutes.

2. Stir in meat and chicken broth. Break up meat with spoon to get it nice and small. Adjust heat so mixture simmers. Cook until meat is cooked and mixture thickens, about 15 minutes.

3. Stir in cilantro. Season with salt and pepper to taste. Serve!

So now we make this delectable filling in to a masterpiece. Bake up a few corn tortilla taco shells. Take a soft flour tortilla, smother with some cooked refried beans. Put crispy taco shell inside and spoon in a few spoonfuls of taco meat. Sprinkle some cheese in and then cook in about 1 tablespoon of oil in a skillet until crispy and toasted on the outside. Continue to fill with whatever taco toppings you desire: shredded lettuce, avocado, sour cream, diced tomatos, onions, etc..

We ate this so quickly I forgot to take pictures of the beauties.

By the way, do not search for images of Double Stuffed Taco at work. Holy Guano, I had to soak my eyeballs in paint thinner and pray I didn’t get called down to the tech office and fired. Do not search now for those images, unless you are in to that kind of thing. I don’t judge.

Posted in Beef, Freezer Friendly, Uncategorized | Tagged , , , , , , | 2 Comments

tap, tap, tap. hello, are you still there?

We will rise again! Beebrulee is back!

I promise I did not get abducted in South Beach since my last post seven months ago. Wow, what a loser! That would have been way more exciting to come back with an abduction story.

I am alive and well, just living in a new house with a slapyerselfsilly kitchen.  No excuses other than, hmm let’s see- Sold almost the entire contents of my house to combine households with the now fiance (ha.cough.ha- me got rid of everything…) Moved. Got engaged. Took the family to Disneyworld. Started back to work. Gettin’ hitched next month. You know, just normal everyday stuff. No excuses.

Now, I’m promising to get back on the foodwagon. And just wait til you see my new kitchen- ooohhweee.

Stay tuned please- It’s fall and it’s time to warm up the house with good stuffs.

b

Posted in Uncategorized | 1 Comment

Childhood on a plate

Last night I was truly gourmet..this is what I had for dinner. True Love Dinner. While it was Valentine’s Day, I left the fancy for the familiar.

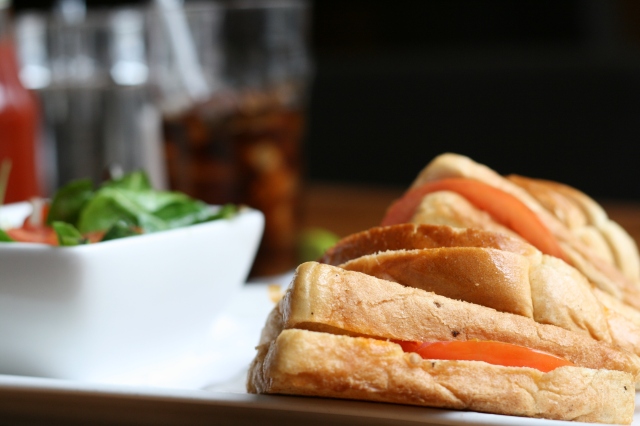
Childhood on a plate

Grilled Cheese is one of my earliest food memories.  While I believe it is hard to screw up a grilled cheese sandwich, I have had a few that are not so good. My dad always made the best. I don’t know if it was his technique of waiting to put the top piece of bread on before he flipped it, using crappy cheese (Kraft Singles individually wrapped- is it really cheese? I think it’s a “processed cheese product” Uh no.)  or if he just made it with lots of love.  Either way, it’s still one of my favorite comfort foods.

While he passed away when I was nine of cancer, a grilled cheese sandwich still brings back lots of love. Climbing to the top of the Statue of Liberty. Seeing every Indian Burial Ground in America (snore.) Building forts in the woods. Walking up to the gas station, up hill both ways in the snow, to buy candy. Decorating my bike for the 4th of July parade. Putting a box on top of a skateboard and flying down the steep driveway, careening in to the woods across the street (it was the ’70’s adult supervision and safety were overrated. Be home by dusk.)

Grilled Cheese Variations to get the blood and cholesterol pumping:

1. Add some slices of bacon and avocado. Maybe a slather of ranch dressing. LOORRDY.

2. Thinly sliced tomato inbetween the melty cheese layers.

3. Sauteed mushrooms and caramelized onions thrown in.

4. Use ‘spensive cheese: Jarlsberg, Gruyere, maybe Camembert and sliced sweet apple.

5. Super deluxe: Cheese, Tomato. Lobster. Like this little number I drooled all over in Toronto last year.

So Happy (belated) Valentine’s Day. Love your Loved Ones. And give ’em extra squeezes and kisses.

b
Posted in Uncategorized | Tagged | 1 Comment

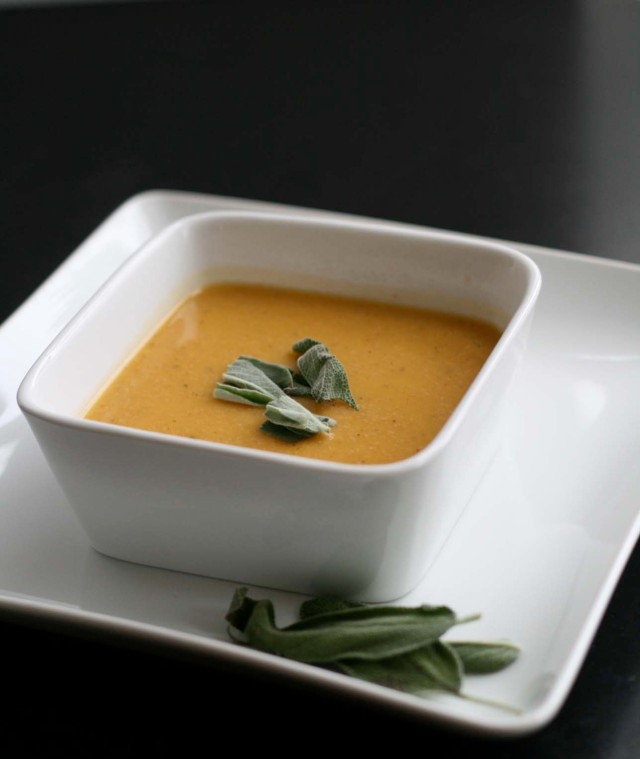
Butternut Squash and Sausage Soup

The cure for Midwest Frozen Finger Syndrome

Here in the midwest, Michigan in particular, we have had a brutal winter. Cold. Snow. More Snow. A lot more Snow.  There are a lot of frozen fingers and optimistic prayers for more daylight and temps above 10 degrees. One perk: Soup.

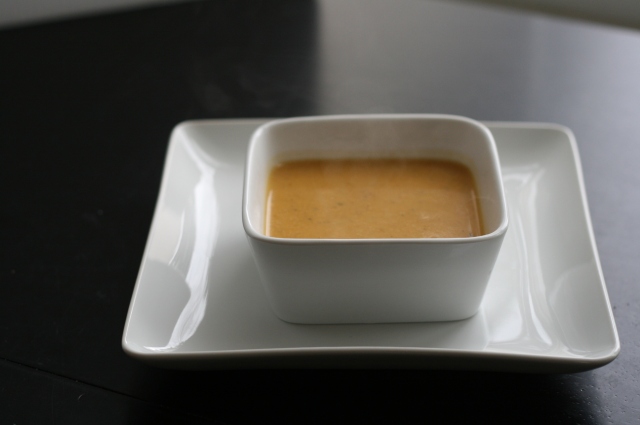
Adapted from a 2001 Emeril Lagasse recipe, this soup is velvety smooth and simple. Typically, I make Butternut Squash soup with a base of apples and bacon (shall make and post another time.)  The addition of a salty, spicy sausage to the sweet smooth butternut is another good combo and one I was drawn to try. So I did. Here’s the proof. Personally, I would have taken out the sausage before pureeing and then added it back in.  Adding the sausage to the recipe, I think, is for texture and flavor, so pureeing it with the squash seemed a little bizarre to this kitchen dweller. I felt like pureeing all that up left you with sausage-flavor soup..see where I’m going here..not soup with sauage in it. Do what you like, to puree or not to puree the meat- It will be in your control path.

Butternut Squash and Italian Sausage Soup (printable recipe)

Servings: about 6-8 


Ingredients:

1 large butternut squash, about 3 pounds

2 teaspoons vegetable or olive oil, divided

1/2 tsp salt

1/2 tsp ground black pepper

1/2 pound sweet italian sausage (use Hot italian sausage for spicy soup), remove casings

1 medium onion, chopped

6 garlic cloves, minced

1 Tablespoon fresh sage, chopped (or 1/2 tsp dried sage)

1/4 tsp dried basil

1/4 tsp oregano

1/4 tsp dried thyme

6 cups chicken broth

1 teaspoon cider vinegar

1/2 cup heavy cream


How To:

Preheat oven to 400 degrees.

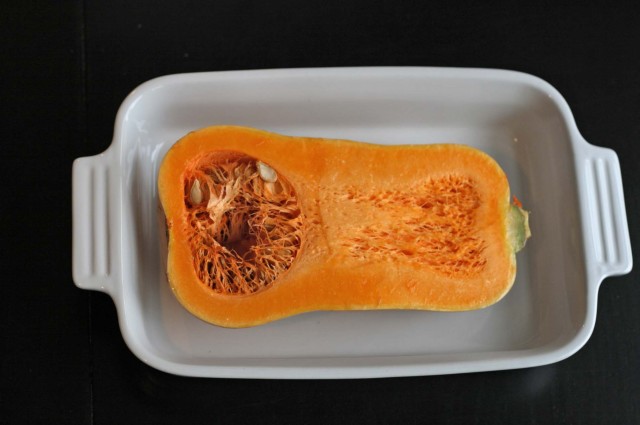
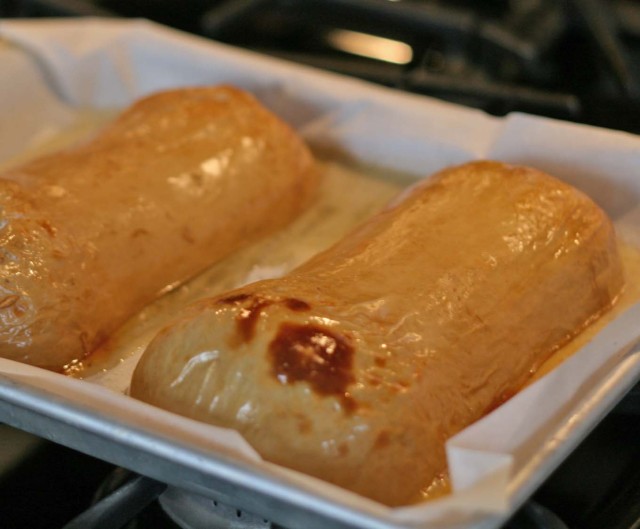
1. Cut the butternut squash in half and remove the seeds. Lightly coat the two halves of squash with vegetable oil (about 1 teaspooon.) Season the inside of each squash halve with salt and pepper. Place cut-side/seasoned side of squash down on a baking sheet (lined with parchment paper makes cleaning up easier.)  Bake until very tender, about 45 minutes. Let the squash cool and then scoop out the cooked sqaush. Discard the peel.

2. In a large stockpot, heat the remaining oil over medium-high heat.  Add sausage and break up into pieces as it cooks. Cook until browned about 4-6 minutes.  Add the onions and cook until softeneed, about 6 minutes.  Add the garlic, sage, basil, oregano, thyme and cook, stirring for about 1 minute.  Add the cooked squash and chicken stock.  Stir well and bring to a boil.  Once the soup boils, reduce the heat to low and simmer for about 30 minutes, stirring occassionally.

3. Using a held-hand immersion blender or blender/food processor. Puree the soup until smooth.  For really smooth soup, strain through a fine mesh strainer into a clean saucepan. Add the cider vinegar and stir to combine. Add the heavy cream and season with salt/pepper if necessary. Serve!


Fat Bottomed Girls You Make the Rockin' World Go Round. (Queen) I have not lyrical stylings for that diddy.

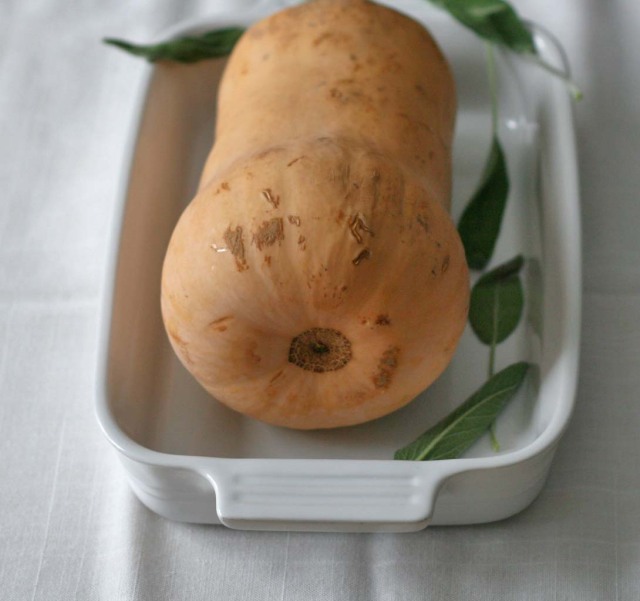
The Butternut. It looks like a tough character but it’s really a good, round bottomed (cheap!) squash.  Roast it and give it life in soups, pasta, on it’s own as a side.  It plays well with sage and bacon. Sweet and salt.

To crack this nut, slice it in half (from the stem to the bottom) and scoop out the seeds as you would a pumpkin at Halloween. If you wanted to roast up some to serve in pasta or on a salad with roasted beets and walnuts (holy good), cut the round bottom off to stablize it. Prop it up and peel the skin off first, then chop it up and roast on a sheet pan with some salt and olive oil.

Scooped, oiled and ready for action in the oven.

If you have parchment paper around, line the pan with parchment for easier clean up. Once scooped, oiled and ready. Place the squash meat side down on the pan. Roast at 400 degrees for about 45 minutes until very tender. While squash cooks, complete step 2 of the recipe.

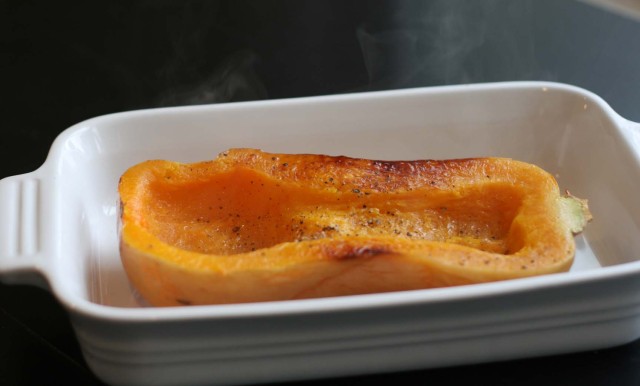
Let the surrendered squash cool then gut its innards and add them to your soup.

Baked and ready for scooping.

Easy. Winter warming soup.

Stay warm Midwesterners. It can’t possibly snow until April.

b

Posted in Soups | Tagged , , , , , | Leave a comment

Stromboli for your Superbowl

Easy. Perfect for entertaining. Make a few with extra napkins around- guests may leave drool marks on your table. Substitute optional ingredients like black olives, green peppers, mushrooms- whatever your craving will probably work!

Stromboli  Printable Recipe

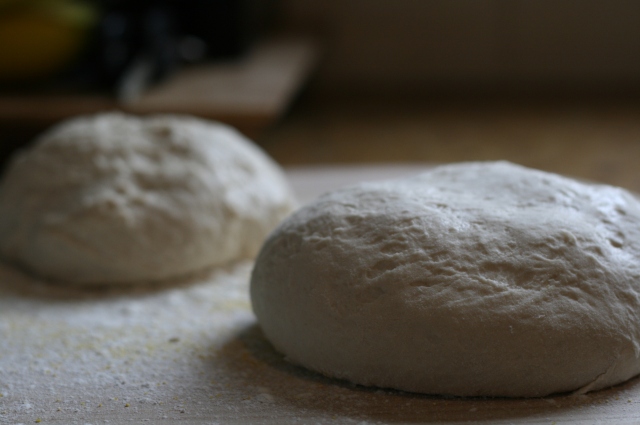
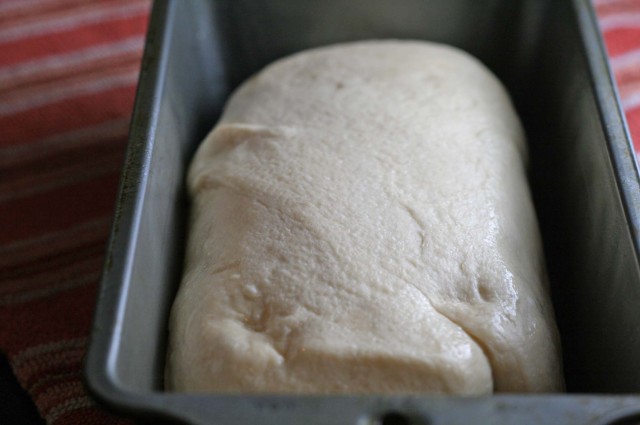
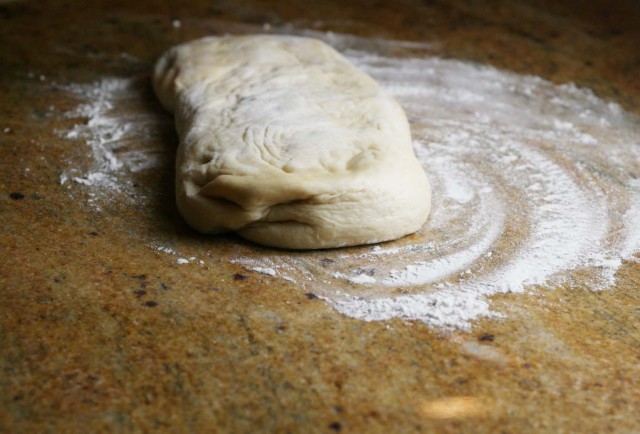
Frozen bread dough. Thawed and ready to roll.

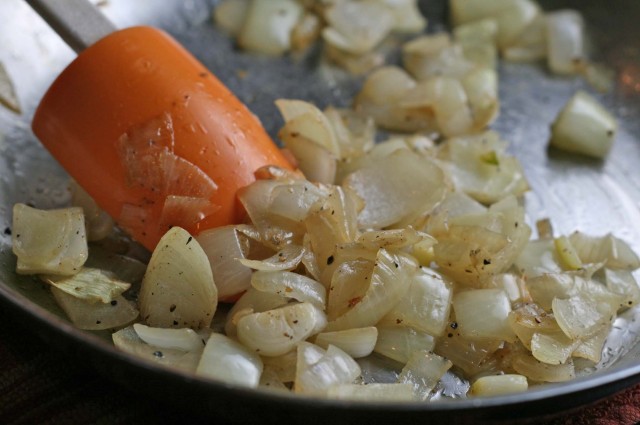
Saute onions in pan until soft.

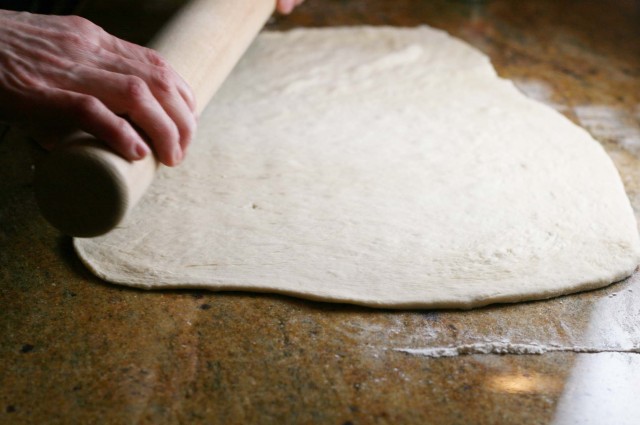
On lightly floured surface, roll out the dough in to a rectangle about 1/4″ thick.

Sad dough ready to be a superhero Stromboli

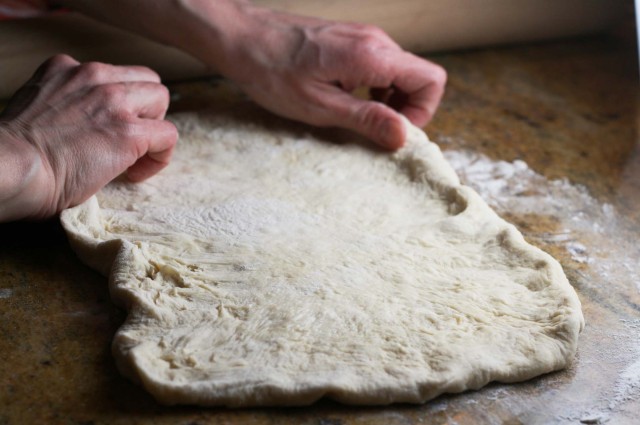
Roll it. Shape it. Stretch it.


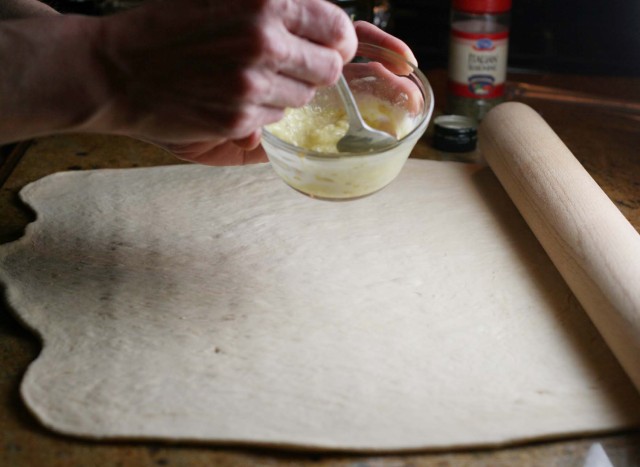
Mix olive oil butter and garlic together.

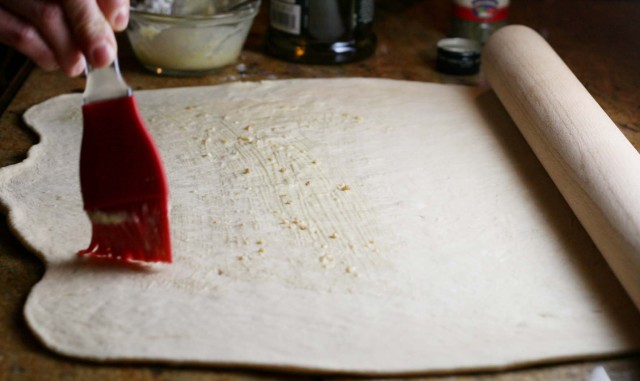
Brush dough with garlic/butter mixture.

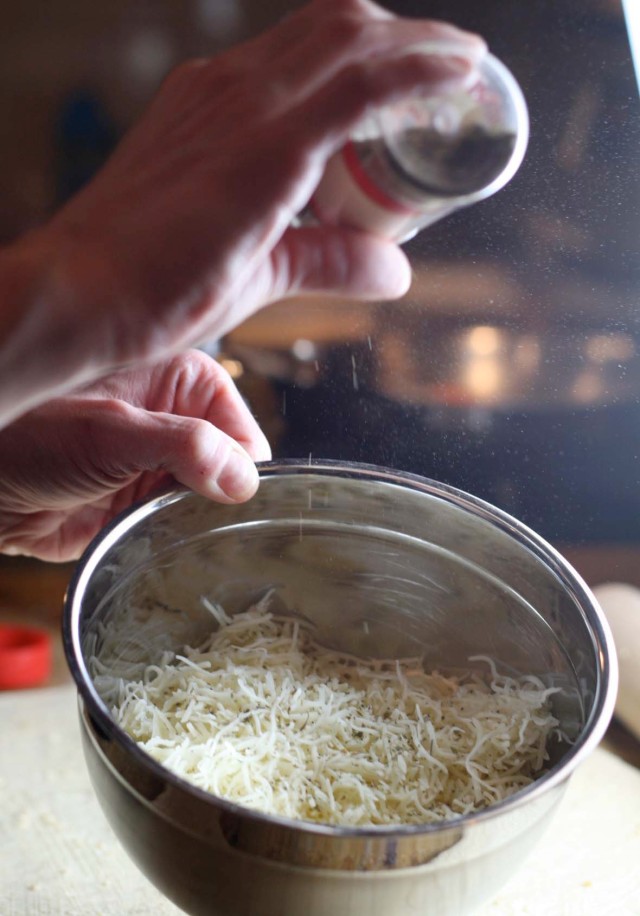
Mix italian seasoning with cheese.

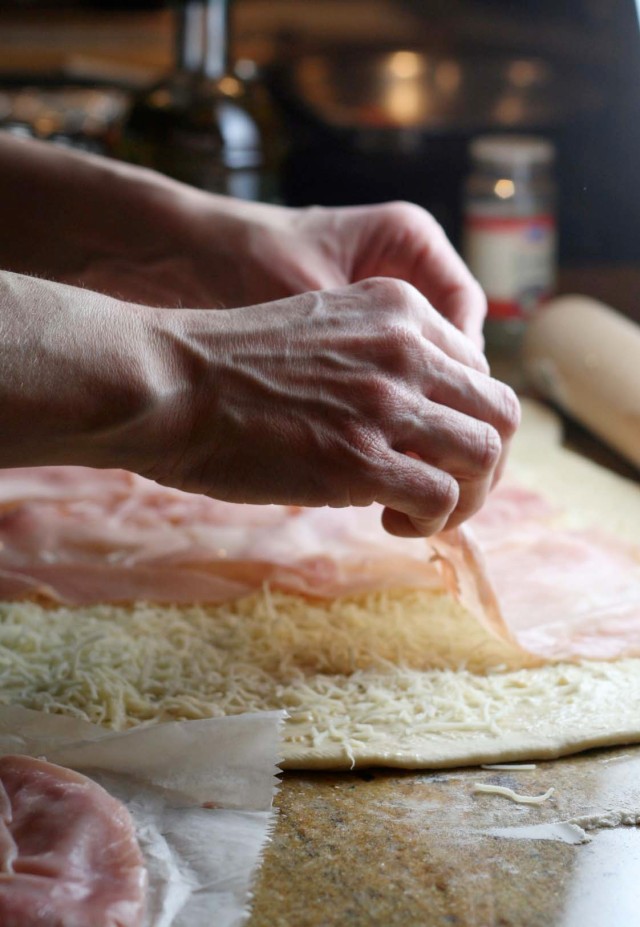
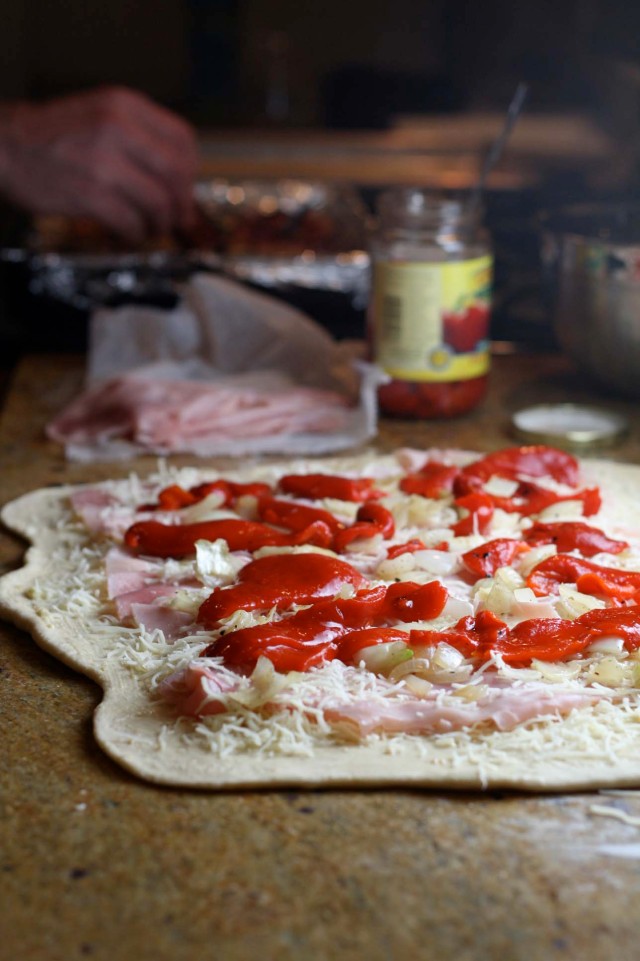
Sprinkle 1/4 cup of cheese over dough and lay down the ham. (I have the scariest, old-lady hands...ignore scary hands.)

Scatter your sauteed onions about.

Add your optional ingredients. Me, I’m just doing red peppers today. Sometimes I feel really wild and sassy and throw black olives or sauteed mushrooms in the mix.

We're building a house of stromboli, brick by brick.

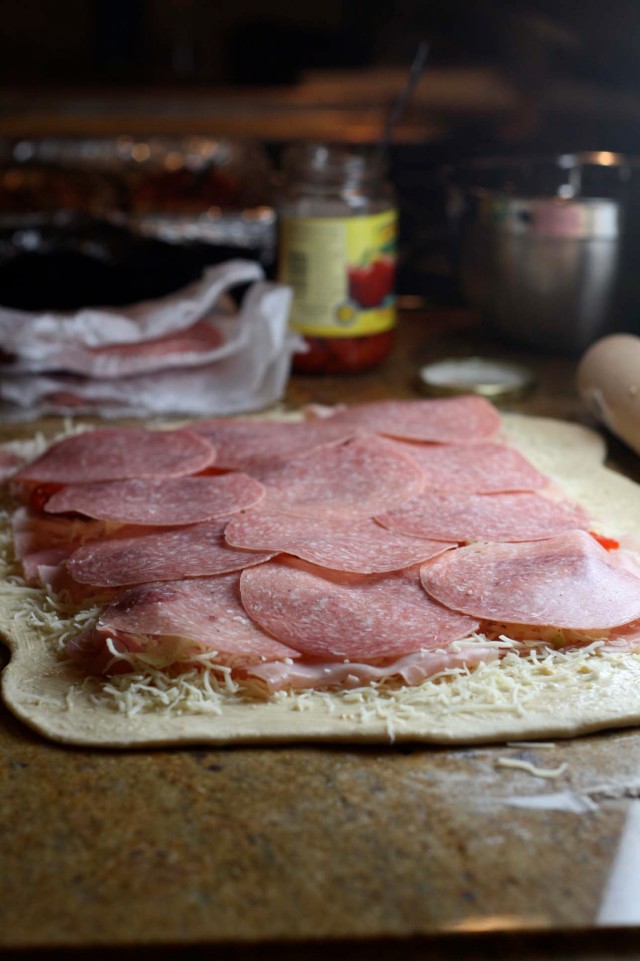
Now  more meat.

Salami meet Ham and Cheese/Onion.

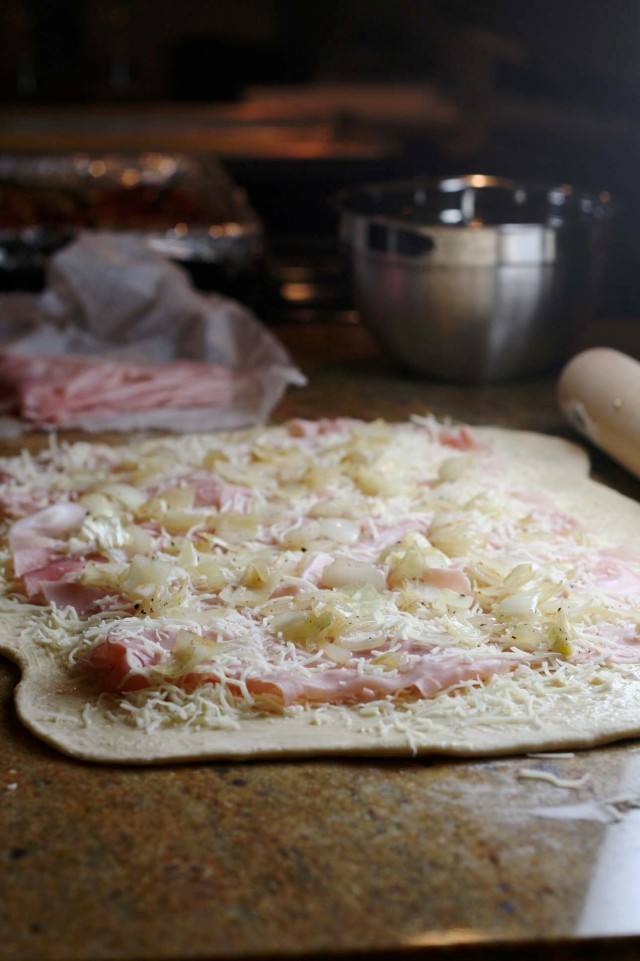
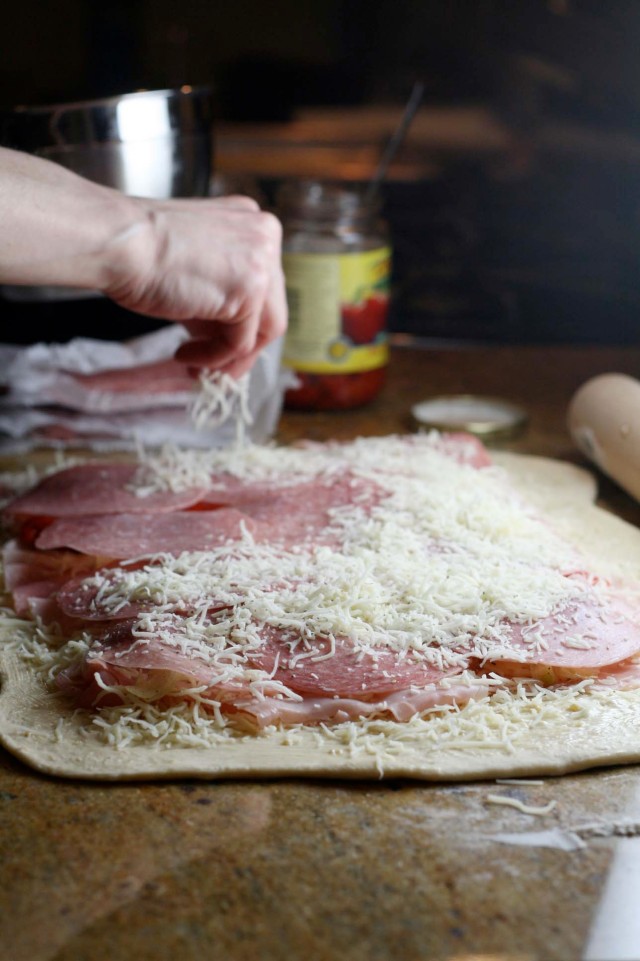
Anndddd more cheese and onions.

This is it folks, the grand finale layer....ohhhhh it's time to roll.

Now channel some B.B. King and Laissez les bons temps rouler. (Let the good times roll. See 5 years of french back in middle/high school. Mrs. Smith would be so proud. I know six other words as well.)

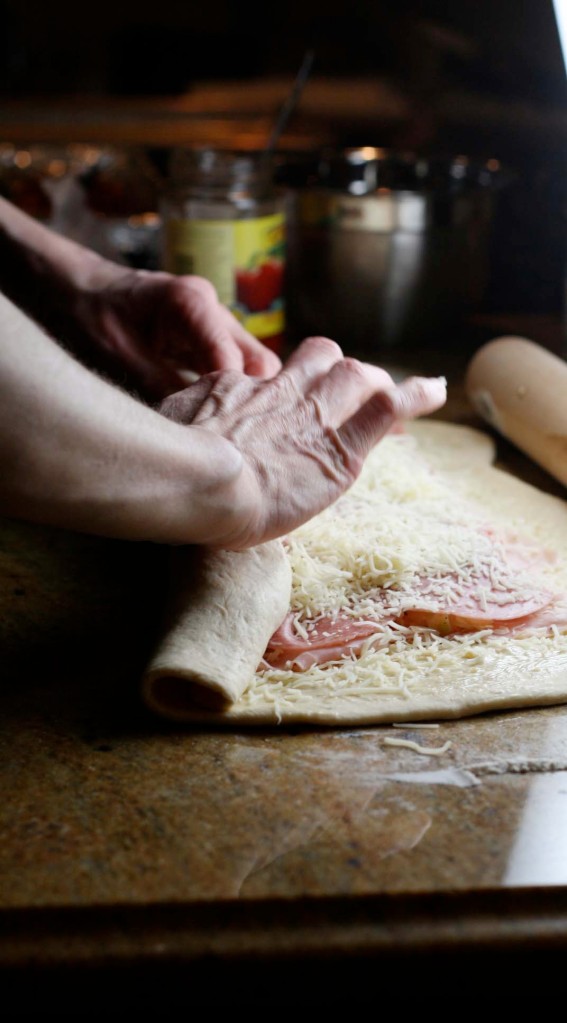
We're rolling. We're rolling.

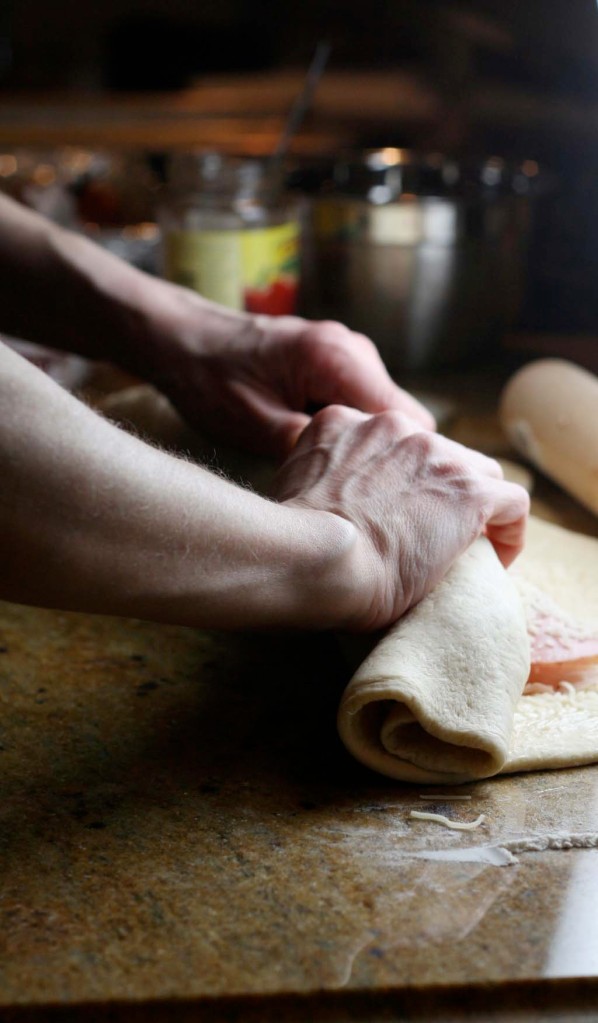
Keep rolling. Not too tight or your Stromboli will split and spill its guts during baking. Not pretty.

As you roll forward, Lift Up the roll so that the ingredients don't just keep pushing forward and wind up on your counter.

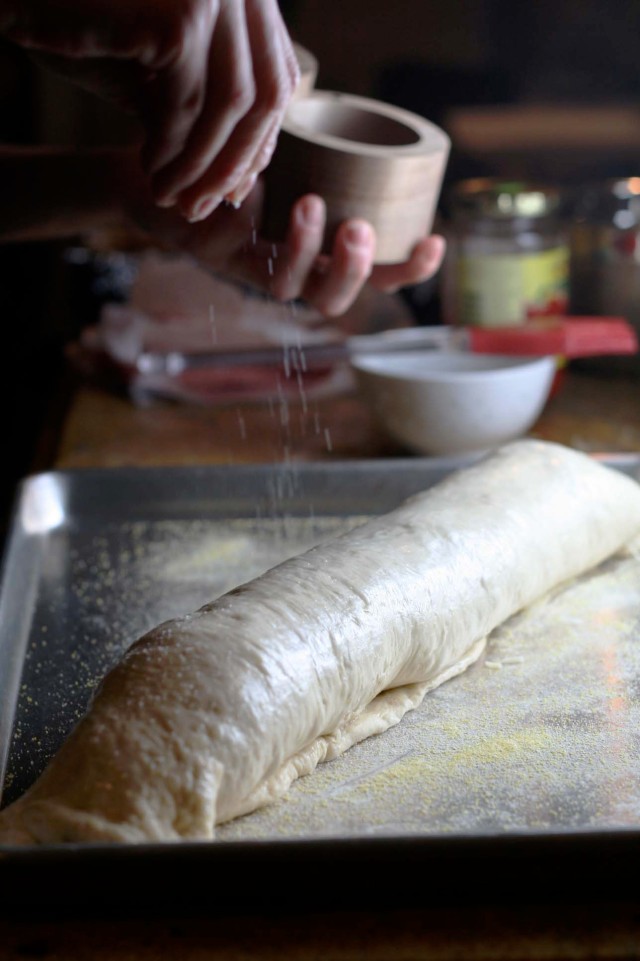
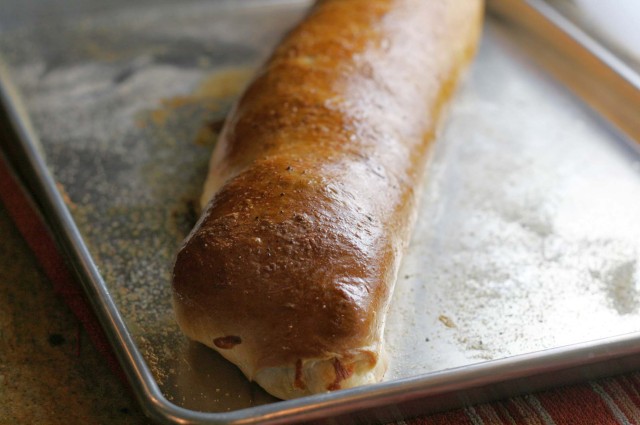
As you get to the end, you’ll have a seam. Fold the end edges under as well. Use the lightly beaten egg white to seal it. Transfer, gently, your rolled perfection to your prepared pan. (Prepared pan= baking sheet sprinkled with cornmeal.) Brush the whole kit and kaboodle with the egg white.

Brush the stromboli with egg white.

Sprinkle with a little kosher salt and some fresh ground pepper and send it on its way to your 400 degree oven.

Bake at 400 degrees for about 25 minutes or until the top is golden brown. When it comes out of the oven, give it a nice brush of olive oil.

Let it cool a bit before you slice in to it. Restraint.

Now slice it up and serve it.  Be ready with print-outs of the recipe- it’s a common request once its been sampled!

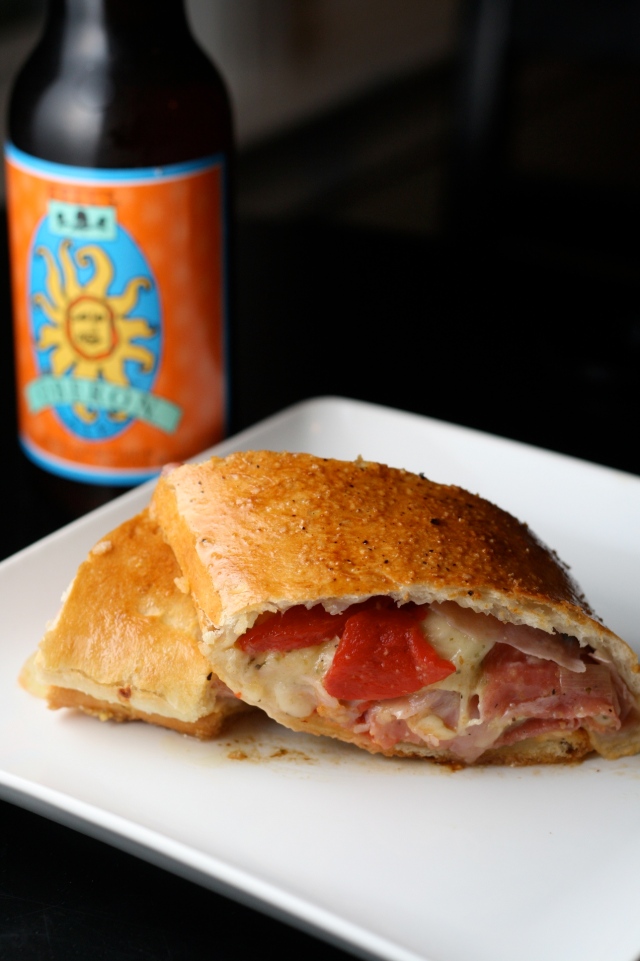
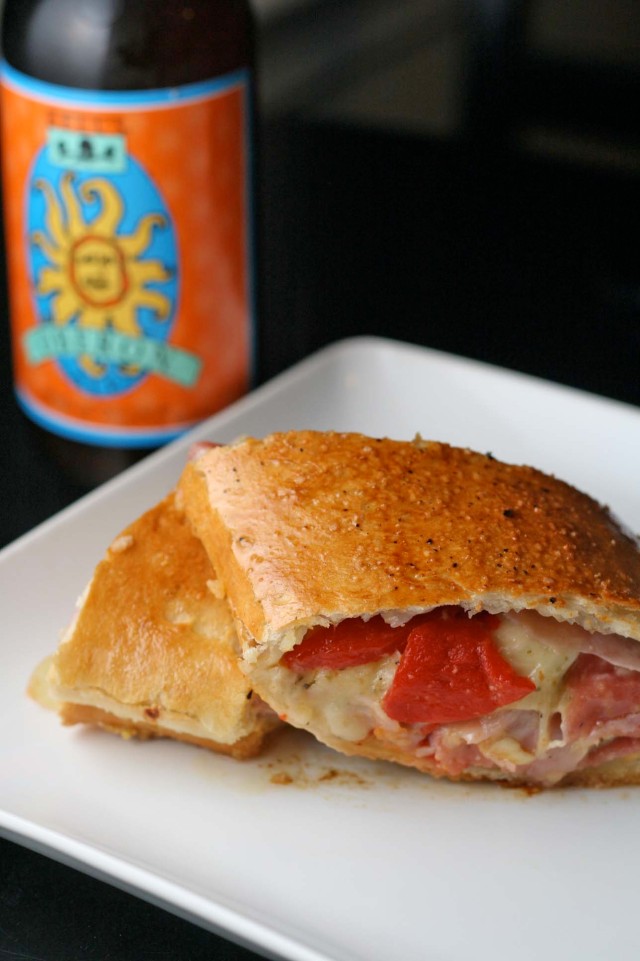
Gooey. Greasy. Melty. Goodness. Have napkins ready.

A thing of beauty lasts about 30 seconds before devouring occurs.

Enjoy!  Off to shovel the rest of our snow-day snow-fall. Stay warm and good luck to whomever you’re rooting for in the Superbowl!

b

Posted in Bread & Baking, Starters & Sides, Uncategorized | Tagged , , , , , , , | Leave a comment

Salty. Sweet. Spicy. Crunch. Superbowl Snack.

True Admission: I really have no idea who is playing in this year’s Superbowl…I only watch for the commercials and the food…Football is not my thing. Marketing, Food, Yep- those I find interesting. But Anywho..this week I’m posting a few Superbowl Snick Snacks. Great to serve or great to take elsewhere.

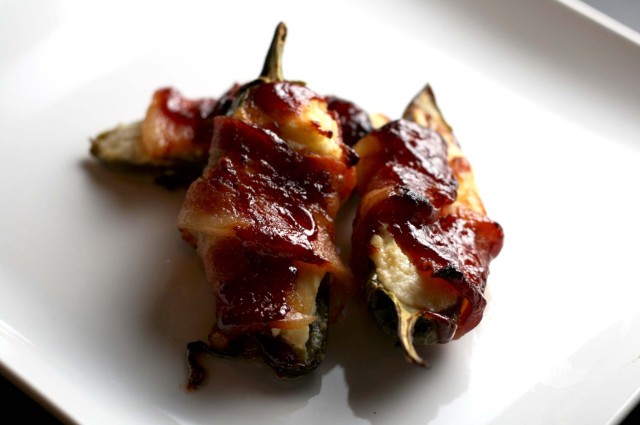
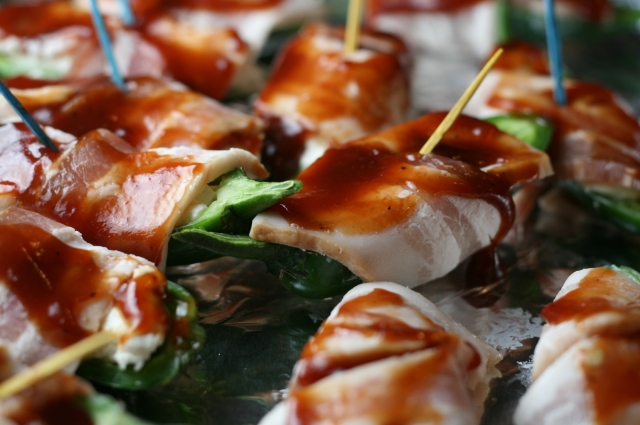
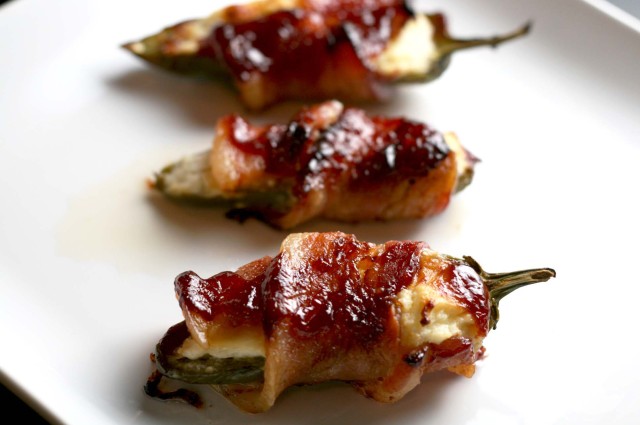
Jalapenos Stuffed with Cheese and Sweet Wrapped in Bacon Smothered with BBQ Sauce. Some call them Jalapeno Poppers but I think of those as the fried chain restaurant kind (blech.) So we shall from this time forward call these Bacon Wrapped BBQ Jalapenos.

Upon a search, there are hundred different variations of this easy appetizer. I played around with the ingredients and found a happy medium. Because I like sweet with salty- I added some crushed pineapple to the cream cheese mixture. The barbeque sauce is definitely sweet so omit the pineapple if you want. These are probably (definitely) not good for you and not low calorie, low cholestrol but we’re talking American past times- football, sitting on the couch, eating. I know I have offended some..sorry..

Interesting enough my spellcheck does not recognize Jalapeno and wants to auto-correct it to Galapagos? Another interesting tidbit- my six year old took all the pictures! Can we say art savant?

So get yer self some Jalapenos- however many you think you’re going to serve. I bought 8, so it made 16 little biters.  Marumodern and I ate all but 2. They are kind of addicting. Shoot pic. Eat evidence. That was sort of the rhythm of this recipe post. If you are making them for a party, figure 4 pieces per person maybe a few more depending on the gastronomical habits of your guests.

This recipe is totally adjustable. Totally forgiving. Totally easy.

Printable Recipe- Click here.

Because these were so easy. I didn’t really take all the step-by-step pics. Let’s just take a moment to enjoy the pics by a SIX YEAR OLD! Really?! Crazy, I think.

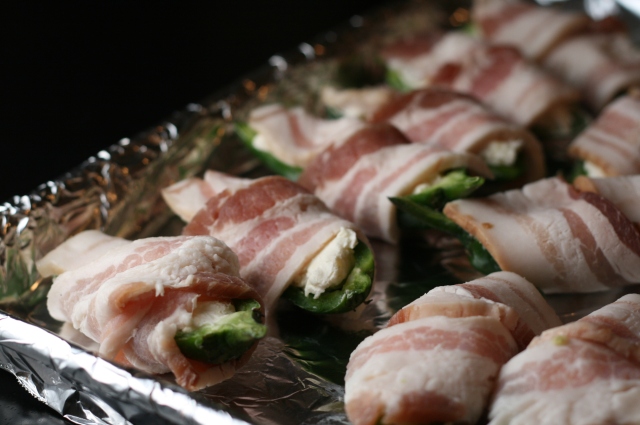
Pig wrapped and ready for oven-lovin’.

Um, are those two jalapenos above snuggling? Adorable. Even jalapenos love bacon.

Delicious. Easy. Done.

Up soon on Ye Olde blog, the stromboli that got me invited back to a Superbowl party and earned me a new nickname by a man whose name translates in to english as Garbage Can. Hmm, interesting.

Enjoy Forks;)

b

Posted in Starters & Sides, Uncategorized | Tagged , , , , , , | 1 Comment

Accessorized Roasted Potatoes

I’m a girl. I love a good accessory.  Meals are no exception.

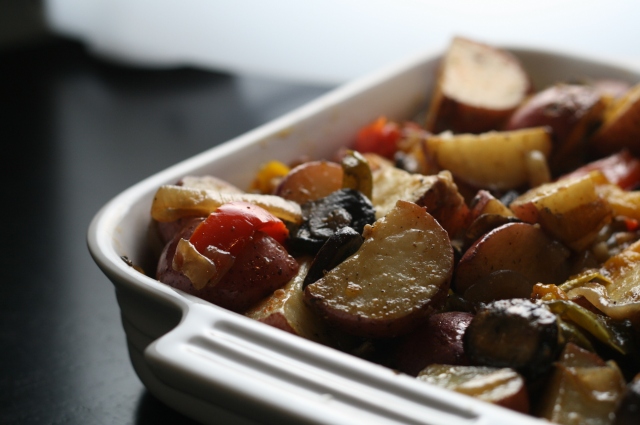
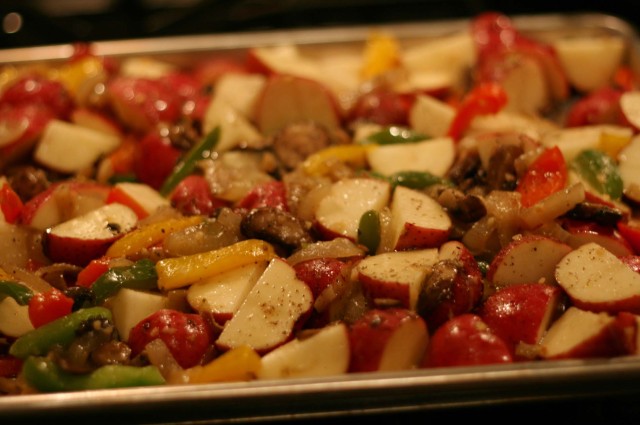
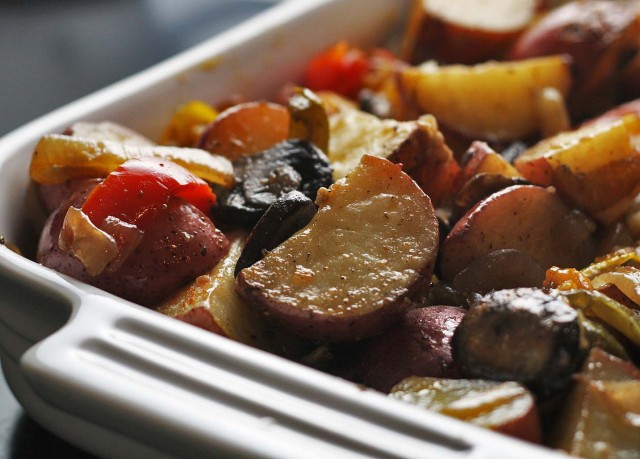
Simple roasted potatoes with the right accessories: roasted peppers, caramelized onions, mushrooms, cheese. Add or delete what you like. Serve as a brunch side dish or I ate it as a meal after it came out of the oven….out of a bowl, right over the stove, with a shovel. I’ve also thrown these in to a frittata with some cooked bacon. Serve with a salad. Delicious dinner.

Accessorized Roasted Potatoes

Preheat oven to 400 degrees. A tip from the fabulous Chef Laura, who runs Tasteful Tours, and has given a few private cooking lessons to our Supper Club. I’ll tell you more about the Tasteful Tours in a later blog…fun!  Chef Laura Tip: Preheat your roasting pan when you preheat your oven. You’ll get a great sizzle when those potatoes hit the pan and begin to roast and crisp on the outside and stay creamy, soft on the inside.

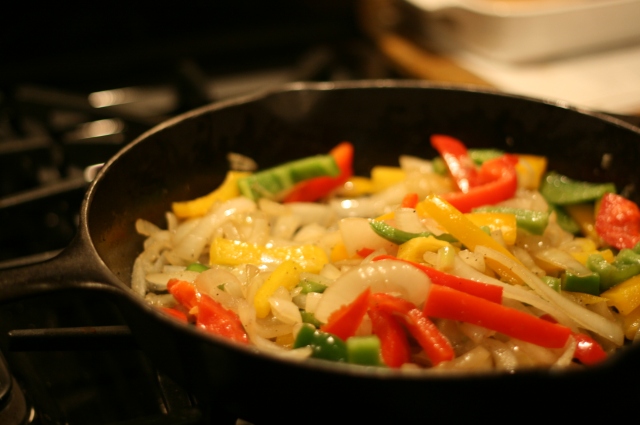
Wash your veggies and cut them up in to chopped pieces.  Heat a large skillet over medium heat with about 1 TBLS of olive oil.  Begin by cooking the onions.  When they start to soften add the peppers and mushrooms. As the mushrooms begin to soften, they will yield a lot of liquid. You want to cook the veggies until they are softened and not a lot of liquid is left in the pan.

While veggies cook. Wash and cut up  whatever kind of potatoes you like. No need to peel them. Didn’t mom always tell you all the vitamins are in the skin. Whether that’s true or not I have no idea but mom’s usually know a lot more than the average man. I used a 5 lb bag of red-skinned to make enough for a brunch for six.

Toss the potatoes with a few tablespoons of olive oil, a few teaspoons of minced garlic and season them with salt and pepper.

Add your softened-up veggies to the potatoes.  Spread out the pototoes/veggies on your pre-heated roasting pan. Bake for about 20 minutes and then use a spatula to turn them over and around the pan. Bake for another 20 minutes or until potatoes are softened.

Potatoes and veggies ready for oven-loving.

When they are all oven-loved, sprinkle some cheese and serve!

Posted in Breakfast & Brunch, Starters & Sides | Tagged , , , | Leave a comment